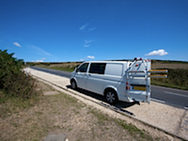

This page will hopefully have updates on the dub conversion and information on the process....
Enjoy
Gel's not just for the cool kids!
Well the main conversion has been complete for over a year and I need to start to look at improvements.
My biggest problem has and always will be POWER! The battery that I installed was a standard wet acid base unit, which was cheap but it has a number of draw backs these are:
- Battery Vapor
- Toping up the water
- In the event of an accident the battery would leak acid in the Dub!
So what to go for. In the end, there was only one option - Gel. These batteries will hold the charge for longer and perform better and safer in an accident.
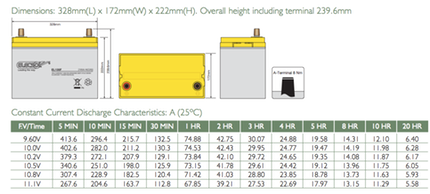
The best company that offers the best deal was Total Batteries (www.totalbatteries.co.uk) There is Elecsol EL135F 135Ah AGM cardon fibre unit coming out at £214 ouch! but it also has a 7 year warranty see the specs below:
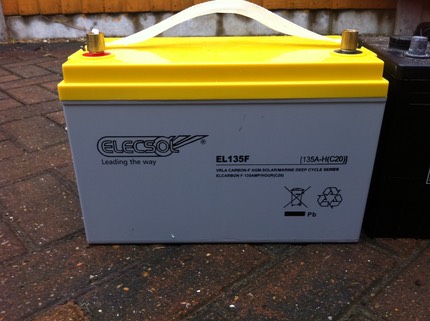
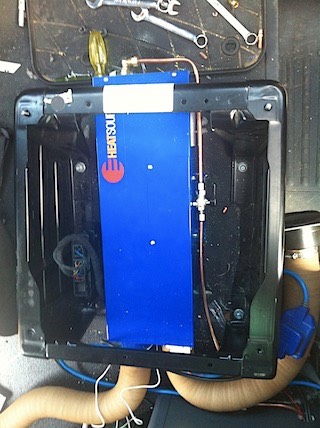
Here's the battery before the install
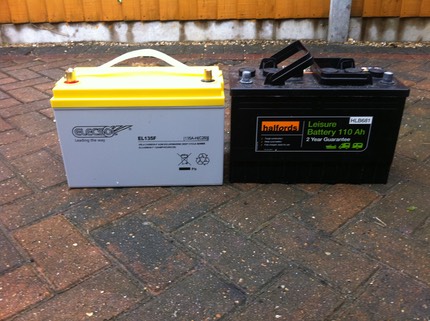
And here's a picture of the old and new battery together, as you can see there's no difference in size.
If you are going to fit one of these, you will need the right changing unit (see earlier blog post on mine) This can be an extra expence, if your charger has to changed.
Was it worth £215
Yes I would say that the unit gives be an extra 20% power to when the original acid battery was new!
Dubs and Dishes
Well, you have to love travelling the country. I know its hard to believe but it does rain every now and again and TV is always nice to view on cold nights. When traveling all over the place, which system is best to use. I'm only going to cover satellite systems, as you can pick up the signal 90% in the UK and most of the places I visit in europe.
I will cover three systems, which I have personal experience of, these are:
Offset camping dishes
Large tripod dishes with easyfind LMB (offset dish)
Multimo dish
I know there are many more systems including complete automatic but these are £1,600 plus which is just mad!
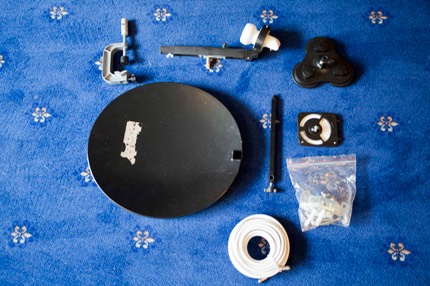
Camping Dish
Camping dishes are great! Most of them can be taken apart and packed up into very small place and are easy to build.
This dish was mounted to the bike rack using the G-clamp. One small problem, the back of the van had to be pointed to the east direction, as the dish was not above the roof height.
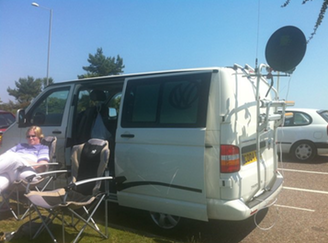
This dish peforms really well in England and Wales but not in Scotland due to it only being 40cm in size.
Awnings
With a Dub, you are always going to have one problem - space! The easiest way to get over this, would be an awning but which one, there are so many to chose from.
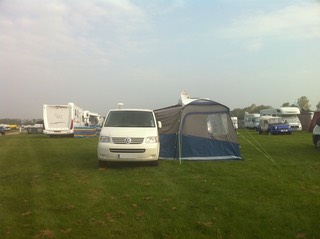
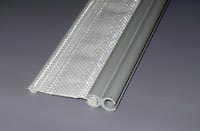
In the end, I decided to go for a Movelite Square, a great little unit with a flap thats pops over the roof and pins to the floor. This was great until one trip, it was very windy and the flap over the roof was banging all night. What could I do to stop this.... The answer was a Reimo rail, which will then allow the 6mm piping on the movelite square to slide into the rail.
Thats great it all works fine but what happens if you want to unhook and pop out without the awning and drive off leaving the awning at the campsite. This configuration will be a real pain! What you need to a driveaway connection kit. This will allow you to just pull out the twin 6mm strip and then drive off and it works.
After a year of this awning, I was having a number of small problems - not major ones - so I started to have another look around and found a Pro version on the Movelite Square. This new 2011 model has fly nets and a porch and much better zips. This one was the one to go for.
CB - Come in Big Buddy!
pa55word007Well at last I’m ready to complete the blog update on the CB install on the dub.
I started off thinking that this would be an easy job, just pick up a handheld CB and use it.

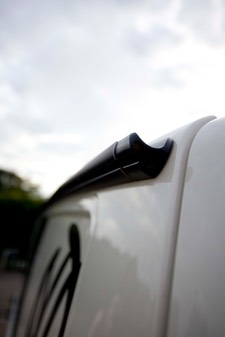
Well not on your nelley, with the amount of noise created because of the lack of an external ariel, so easy… get an ariel and put it on the roof….
So I went off and purchased a Wilson Little Wil, great I thought. I stuck it on the roof and stuck the SWR meter on it and my face dropped I had high readings on most of the channels - this just wasn’t right.
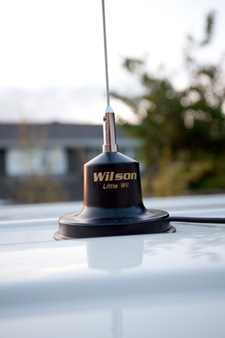
What was the problem? The ground plain, well the lack of one! I could drill into the roof, which would allow the body to acted as one, but there was no way I was going to do that, so what could I use.
A website called http://www.4x4cb.com had the answer. An Artificial Ground Plain, which you can bolt it on to the bottom of a standard whip. So I purchased a Solarcon 'Dial-A-Match' 36 Inch to complete the setup, this was then bolted on to the bike rack. Did it work ohh yes!!
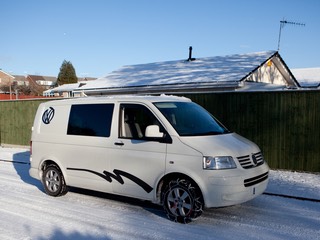
Tyres and Chains
It's a bit late in spring to talk about tyres and snow chains but I think its worth it.
About November last year I could see that this winter was going to be a bad one again so instead of complaining about it I would kit the van out before the weather started, so what to do first, the tyres on the van where fine and I didn't want to bin tyres with 5mm plus of tread so I started to look into chains... there are so many on the market in the end I was seeing a lot of good reviews on "Thule" chains and found the best deal from towequipe.com but there was still so many types to chose.... in the end I went for the CS-10 097 to fit my standard 205 65 x 16 tyres, these chains had a very easy on and off system.
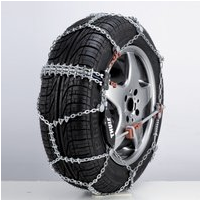
I got the removal of the chains down to 30 secs and putting them on to 5mins a side the chains performed very well in show 1 inch to 5 inches and the ice breakers where great.
From the picture below you can see the impact to the ground!
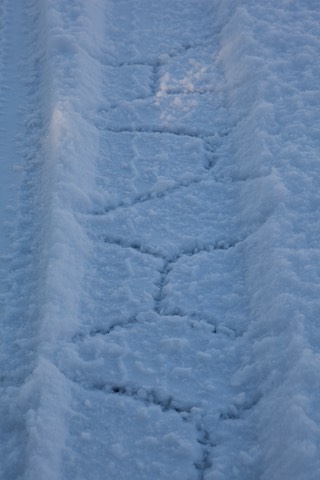
This was all great for the large snow falls but I had another problem if the snow was not at an 1 inch deep then chains became more of a problem.
Internet Access
Not quite part of the conversion!
But still to me a very important thing to have to complete my mobile photography studio,
as I'm always needing broadband to upload pictures its taken months to get the right solution.
First I started to look at broadband dongles that all the main mobile phone companies supply. But these have a major problem...most of them do not have an external areal which makes them as much use as a chocolate fireguard with any signal less than 50%.

So what next!
I was very interested in a new bit of tech called a Mifi and what is a Mifi?
Mifi allows a person to connect a laptop or other wireless enabled device to a wifi router with a built-in SIM card slot in it but these devices can be very expensive.
Then I came across a T-mobile wireless pointer which costs £59.99 plus a topup on a pay as you go deal great!.

I got my one unlocked as I already have a Vodafone contract and want to use T-mobile and Vodafone to give me the largest coverage possible. This works very well I also put the pointer in a water proof bag and then put in of the roof which gets over the problem with all the metal in the van and also gets over the areal issue.
Turn up the Heat!
Heating!
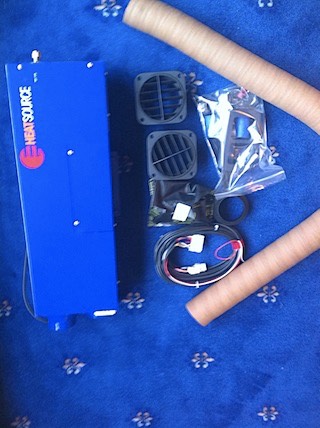
The big question - what do I go for... probably the biggest question I have to ask myself on the self build! Do I go for a cheap 240v oil heater only on hook up or diesel... well over 50 hours of internet searching, I think I have the answer. GAS and hook up! The reason... mainly noise, diesel units need more maintenance and are really noisy.
The heater that I fitted was an Propex HS2000E (gas and 240v) so I looked on the internet and found one for £600 bargain! Over xmas I waited for the heater to turn up which it did.
Where to install it? In the end, the only place left was under the drivers side seat (a bit tight with all the support under the van but got it in):
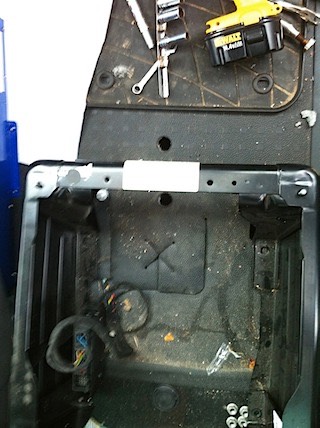
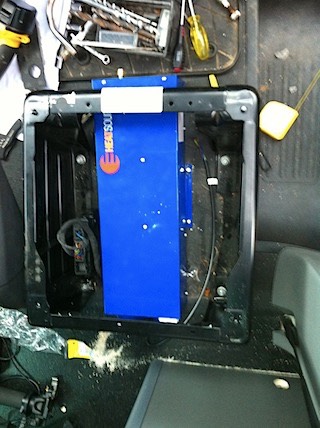
From this picture you can see that it only just fits:
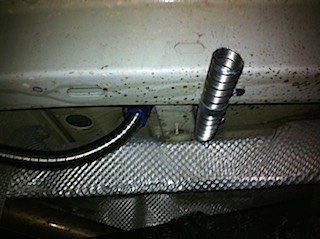
You can see the exhaust pipe goes to the back of the dub and the inlet comes just from the side can any one see the balls up!!! I didn't - I will go into more detail later!!!.
With the unit installed I piped the gas to the front of the unit:
...and the 240v supply to the rear only took about 5 hours to get to this stage! Well tested the 240v no problems, works a dream so hot so quick with 500w,1kw and 2kw settings but the gas system would not fire (pardon to pun!) I was getting a 4 light error! I checked everything couldn't see any problems so I emailed the manufactures. Propex heat source (http://www.propexheatsource.co.uk) and await an email back.
Going Green?
Ok So I now have my charging system for the dub on the move but I’m hitting problems with 12v power when I am camping for more then two days. So I have been looking at other ways of creating power.
Wind Power
There’s always wind what about a wind turbine? Well I had a good look around and found a couple of units that would do the job, so I went and had a look at a couple on an US camper.
Yes power output was good but the noise was just to much and the set up time would be over an hour on site before I could start to get every thing else sorted.
Solar Power
This was I’m sure going to be the way forward as I have seen some very thin panels fitted to boats but what about the cost?. Yep this was the problem for the size of panel and a 65w output I would need most good panels where over £700 so I started to look all over the net of a panel that would do the job and I found a company called http://www.sunshinesolar.co.uk they had a panel called “Sunshine Marine Solar Module 65W” and the cost was just under £400 per panel, Result!
12v Charging?
The next big thing was power! What sort of system do I need, I want something to charge my 12 leisure battery but would not over charge the system (like a standard split charge rely would) The best option was going to be Sterling 50a 12v-24v Batt-Batt Charger the reason:
The best way to charge a battery is by using a 4-step battery charging curve which cannot be achieved from a standard alternator. This charger unit is simply attached to a standard engine starter battery. It then fools the alternator into working at its maximum ability in order to ensure that all its surplus power is utilised to charger the auxiliary battery bank. The system is designed to use only the surplus power and, at all times, ensures that the power required to run the primary system (the vehicle’s or boat’s engine system) is not affected. The surplus power is converted into a higher voltage and used to charge the secondary battery bank using a digitally controlled, programmable 4-step charging curve.
In a nutshell it charges your domestic battery system about 5 times faster than it would otherwise be charged and helps to ensure that the batteries are working to their maximum ability, enabling them to produce their full potential power. It also increases the life of the batteries by helping to de-sulphate them.
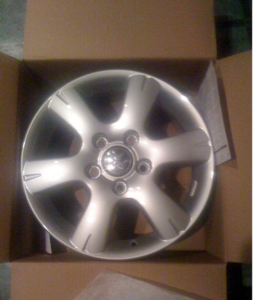
Wheels Man Wheels!
We one of the last things I was looking for was wheels but at the same time as we had the windows fitted the boss at vanworx’s has a set of VW wheels from a dealer that when bust and at the price he quoted me I couldn’t say no even Clare was happy to pay the money for them ! and our original tyres would fit on them!.
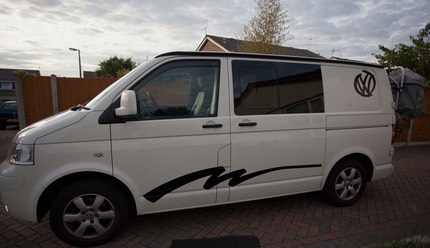
The Birth Of Herbie
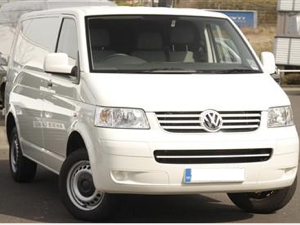
Well the conversion had to start some where so off to a number of V-dub dealers..
it took a number of weeks looking around finely we found a T28 at the local dealer (breeze) after a couple of issues with one of the sales staff we go it for £11,000 (6 months old!) really pleased very basic but as we were going to strip it down and start again it was just the job!.
Where to get the conversion done!
The next problem after buying the van was to find a company or companies to help with the conversion, looking around our local area the best company for the job was vanworx.co.uk. we popped over one week day to have a look at some of there work and workout what we could get done with out budget!. The lads where very helpfully looking at all the toys we could fit on the van! it was endless, so we had to prioritise which things needed to be done first, we settled on the windows one for the sliding door and one for the opposite side so we booked the van in.
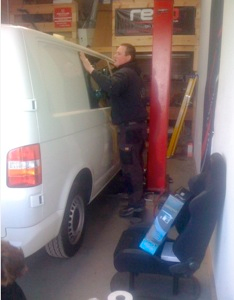
The day of the windows fitting.
We popped the van over to them for the windows to be fitted it was going to take 6-7 hours to fit so we when off to weymouth town centre. We popped back later to see how things was going and we go a picture of the metal from the van see below:
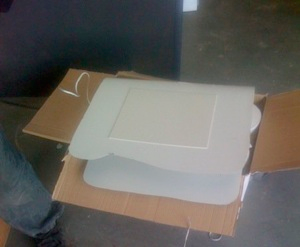
And the last window was being fitted so I had to take a picture!.
View Comments